Friday, June 13, 2014

Personalized Map for the Travel Loving Couple

Personalized Travel Map

It's June! Wedding season! Just when I thought we were done with weddings for a while, we had one in May and one just last week! Here is my personalized wedding present for each couple--I've seen it done in various ways by different people. It's a really simple, cost-effective way to make a one-of-a-kind wedding gift for those special couples in your life who love to travel. I am almost tempted to create one for myself, though my hubby already bought us the National Geographic version a while back.

For this project I employed the skills of my hubby, who helped create the map. We searched online to find a jpeg of a world map--it was hard to find one that not only had country borders, let alone major cities, so in the end I went with a blank map with only outlines of the continents. Only later would I have the idea to create map pins that would have the names of cities on them. Hubby then used PhotoShop to change the map colors to gray and white, and we added the couple's names to the bottom, along with the saying "Our World Adventures."

We took this file on a zip drive to our local Kinko's, where they had a special half-off deal on posters. They took my world map jpeg and enlarged it to 18 x 24 inches, then mounted it on sturdy foam board. I went to Joann's where, of course, they were having a huge sale on all their frames, so I picked up a couple of 18 x 24 inch poster frames.

Even without pins the map already looks good!

The next step was to create my map pins. For this I bought a box of extra long satin pins from Joann's, along with this cool adhesive kraft paper I found serendipitously. With my handy Fiskar's paper trimmer I cut this sticker paper into 2 inch by 0.25 inch strips. I folded them in half and then cut the ends to make flag banners. I peeled off the adhesive backing and attached each flag to a pin by just sticking both halves together. With the self adhesive paper there was no gluing necessary, which was a great time saver. Only thing left to do was write down the names of various cities I knew that these couples had traveled to. For the special cities, like where the couple got engaged or married I placed tiny hearts on the flags.


For the couple's future travels, I enclosed blank flag pins in a tin case I had lying around and in the original plastic case that the pins came in. I created a special label for each.


Last but not least--personalized wrapping paper! Super simple--just took kraft paper I had in a roll and started stamping away. Then used large sticker letters to spell out the couple's names. Tah dah!


Graduation Season Part 2: Graduation Cards

Here are a his and her version of a graduation card I made for the son and daughter of two nurses of mine. I love this quote from Ghandi, which I first heard while I was a student at UCLA, and the message has stuck with me since.


Graduation Season Part 1: DIY Name Sign and Money/Paper Lei


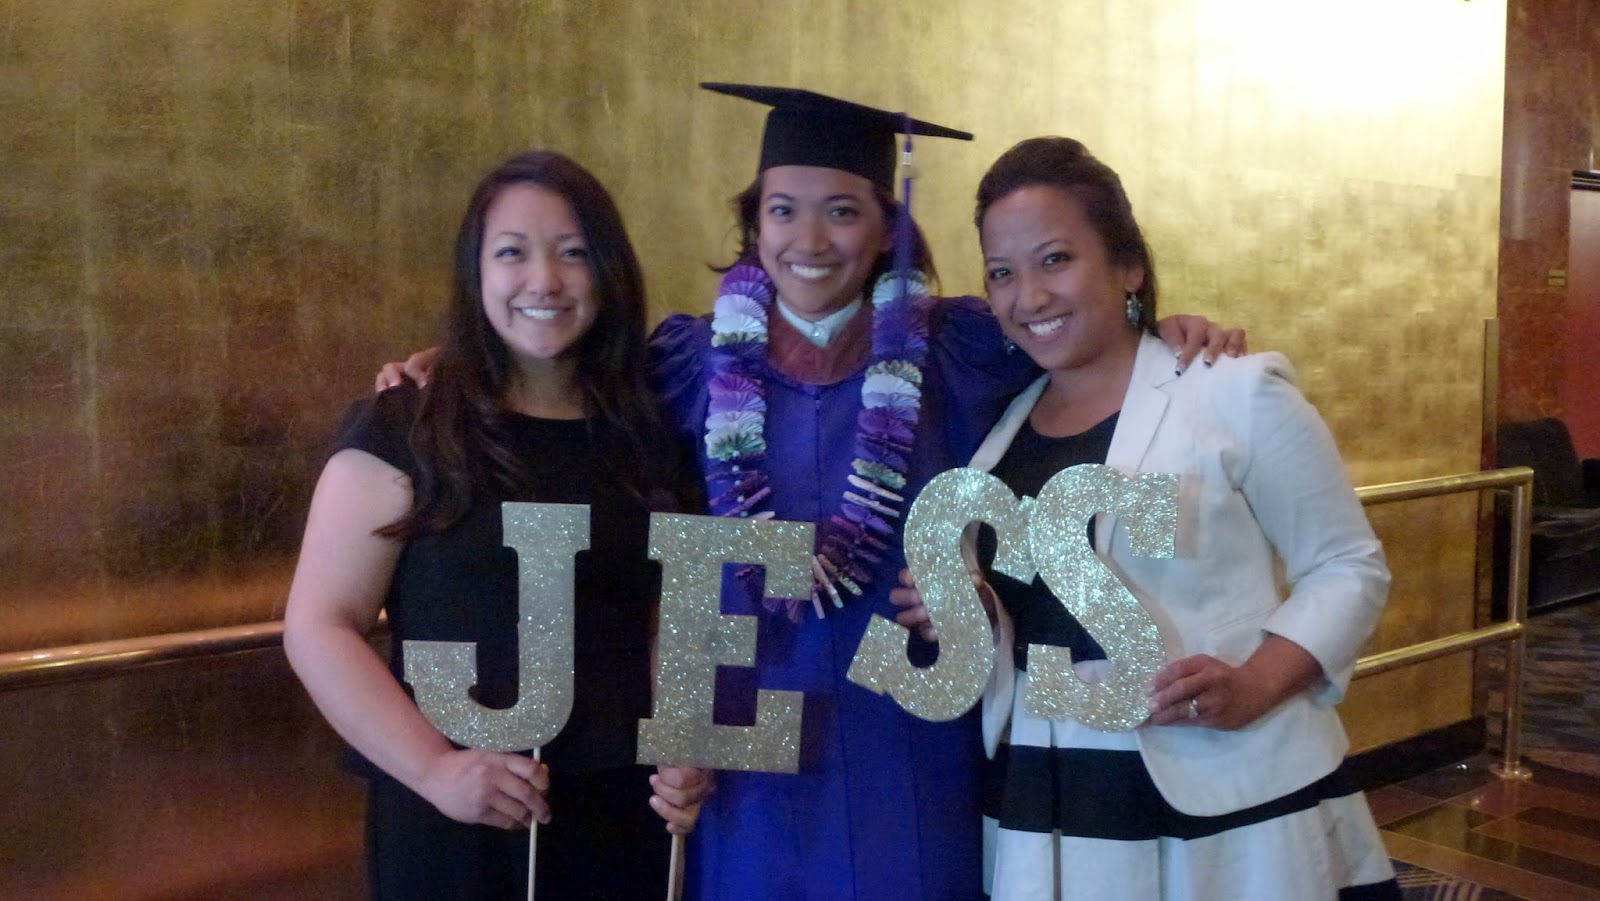
Here are two things I made last month for my sister's grad school graduation from NYU Tisch School of the Arts. Knowing ahead of time it would be a huge graduation with a ton of people, I wanted to create a sign that would be easily spotted from afar--nevermind that the security at Yankee stadium wouldn't allow us to bring "sticks" into the graduation (we were able to sneak in two of the letters unscathed). With my sister being a superstar director, I wanted gold and glitter, of course.


Step 1. Found these large flat wooden letters at Michael's.

Paint letters in acrylic paint. 2 coats should do. Let dry.

Step 2. I sprayed the front with a can of spray adhesive--do this outside if possible.

Step 3. Shake on glitter.

Step 4. Flip over and using wood glue, attach wooden dowels or sticks. Let dry. I applied tape as well for extra security.


The second thing I created was a lei made out entirely of paper rosettes, using cardstock and dollar bills. *WARNING* This project is very time consuming and tedious, and I would only recommend this for very special occasions!

Step 1. Cut cardstock into the size of a dollar bill. Including my dollar bills, I had 56 pieces of paper.

Step 2. Score paper lengthwise first, then score in 0.25 inch increments.


Step 3. Start folding in an accordion fashion--the most tedious part! Have a movie or tv show going in the background!


Step 4. Take small hair elastic bands and place along the middle of each rosette.


Step 5. Cut two strips of thin ribbon, 5 feet in length each. Tie both around something sturdy--I used the back of my chair. Begin alternating paper rosette with plastic bead. To get both ribbons easily through the bead I unfolded a paper clip to create a "hook" to thread the ribbon. For the paper rosette, you basically want to sandwich it in between the two ribbons, with the bead holding it in place.


Step 6. Create rosettes by fanning out the paper and attaching the ends to each other. I attempted to just use tape at first, and this was a big fail. It is much faster and easier to just use your hot glue gun. In case your recipient actually wants to use the money in the lei, I would recommend NOT hot gluing and just using tape for the dollar bills.


Step 7. Tie ends of ribbons together to create a loop.

It looks great in the end, though it took a lot of work!